Are you thinking about taking on snowshoeing? Or are you still wondering if it’s the right activity for you? Well, there is no better way to ascertain that other than just giving it a shot and experiencing it yourself. Go out there and get yourself a pair of great snowshoes. If you don’t feel like buying ones, then you can rent them in any Nordic centers or cross-country ski resorts. Don’t forget to dress properly too. It can get pretty cold out there down the snowy trail.
Is that all? Nope, not even close. As much as I love the simplicity of snowshoeing, compared to other winter outdoor sports, there are still a number of things I’ve got to prepare beforehand and things I’ve got to watch out for. And you should too if you want to stay on the safe and fun side. This ultimate guide aims to provide you with essential tips for your first snowshoe outing. Note what’s important and you’ll be fine on your way.
Why Go Snowshoeing?
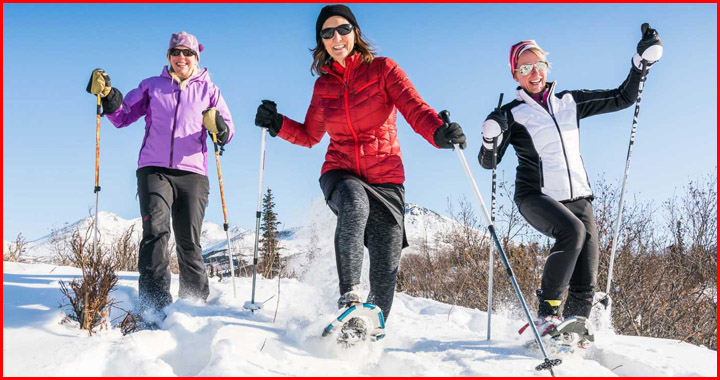
Did you know that since 2008, snowshoeing has become one of the fastest-growing sports? It even beats snowboarding, and as you can guess, the number of participants increases gradually every year. Why? You may wonder. The answer is simple. It’s fun. For avid hikers, snowshoeing can be a means to extend their hiking season into winter. For runners and other athletes, snowshoeing can be a fun way to stay fit during the cold long weeks of winter. Even adrenaline addicts who are always on the pursue of untouched snow often bring snowshoes to get them to the most remote backcountry accesses. From there, they’ll launch themselves using either snowboard or skis.
In terms of difficulty, snowshoeing offers almost zero learning curve, allowing people of different age ranges and skills to participate. Even kids can do it. Now, what happens when a bunch of people from many different backgrounds partake in an easy sport and run to each other on the trail? Yup, it would be a fun and friendly gathering of people. The thing is, when you snowshoe, you’re bound to have new friends. You get to see the beauty of nature when it’s blanketed in snow and share that moment with everyone. I’m sure that will get any adventurous soul hooked. But in case you need more reasons, check out this post.
How Hard Is Snowshoeing?
Can you walk? Can you stand back up after you fall down on your bums? If you have no problem doing any of those, then I’m sure snowshoeing won’t be a problem too for you. What I’m trying to say is, snowshoeing is easy peasy. It involves just walking and walking. Sure, you may need some time to get used to widen your stance. And if you’re not much of an athletic person, you may find yourself catching up your breath after 15-20 minutes, especially if you don’t pace your walking properly. But other than that, there is nothing really hard about it.
How to Snowshoe: Basic Techniques on Snowshoeing
Starting Out
You may feel a bit awkward the first time you put on your snowshoes. Their extra width requires you to make a wider stance so that you won’t hit each snowshoe with the other. Walking in snowshoes is pretty much the same as normal stride. You may need to lift your knees a little higher, especially if your snowshoes feature a fixed binding. After your first session, you may experience pain around your hips, but that’s normal. Your muscles are adapting to your new walking form.
Anyway, when you’re just starting, always remember to snowshoe on flat terrain. If possible, choose a cross-country skiing trail that’s already groomed. Getting used to the large contraption strapped on your feet is much easier if you do it on flat ground instead of steep inclines. Also, fresh powder is trickier than packed snow, so it’d help too if the trail is groomed.
Climbing Uphill
The most common method used to ascend through steep inclines when snowshoeing is called “kick stepping.” It requires you to kick the front of your snowshoes against the slopes like you actually mean it. It’ll help the crampons dig deeper into the snow, giving you better traction as you climb up. Anyway, using poles when ascending really makes a difference, especially when the slopes are covered with crusty snow. Also, if your snowshoes are equipped with heel lift bars, don’t forget to engage them. They greatly reduce fatigue on your calf muscle by providing support for your heels.
Going Downhill
The key to a safe descent is keeping your body relaxed. Bend your knees a little as this will help you move easier without overswinging your legs. Put your poles in front of you to help with the balance. Now remember that going downhill is much easier if your snowshoes come with heel crampons. All you need to do is shift your weight at the back, which you can do naturally, and the crampons will do the job, securing your feet to the ground.
Now the story will be different if you wear entry-level snowshoes that mostly are stripped off any heel crampons. If this is the case, you will need to put your weight on your forefoot to enable the instep crampons to grip the snow. It’s difficult and risky. You may experience slipping or even falling down. You’ve got to be cautious all the time. When you feel like slipping or falling, quickly sit down on your bums. It’ll stop the motion instantly.
Getting Up After a Fall
If you properly do the basic techniques above, your chance to tumble down would be pretty low. Still, if you do fall, the easiest way to get back up is by rolling on your front side. Get to a crawling position with your knees and hands on the ground. Steady yourself and stand back up.
For complete basic techniques of snowshoeing, check out this post.
Getting the Snowshoes
Rent Them
If you have never tried snowshoeing before, I’d suggest that you rent your first pair. Although many would agree that snowshoeing is a great and fun outdoor activity, you still have no idea if you’re going to like it. Besides, finding a snowshoe rental is not that hard nowadays; thanks to the sport’s growing popularity. Any Nordic centers, conservation areas, and cross-country ski resorts should have a bunch of them.
The best thing about renting snowshoes is it’s dirt cheap. The average fee is around $10. Just so you know, a new pair of entry-level snowshoes like MSR Evo costs around $100 while full-fledged backcountry snowshoes like MSR Ascent are priced nearly $300. Additionally, when you decide to rent your snowshoes, you really don’t need to do any research about which snowshoes will perform the best for you. The clerk will find one for you, taking account of your total weight load and the terrain condition you’re going to.
Buy Secondhand Snowshoes
I would advise you against this. Even though used snowshoes come at much lower price, they may have been through a good deal of wear and tear on the trails. If you still insist, then keep the following tips in mind:
- Check the frames for damage.
- Check the bindings. See if they still function properly or if they have come loose.
- Check the decking. See if there is any puncture or even major cracks.
Be sure to verify who you are buying from. Trust me. You don’t want to be stranded in the middle of the backcountry with broken snowshoes.
Buy New Snowshoes
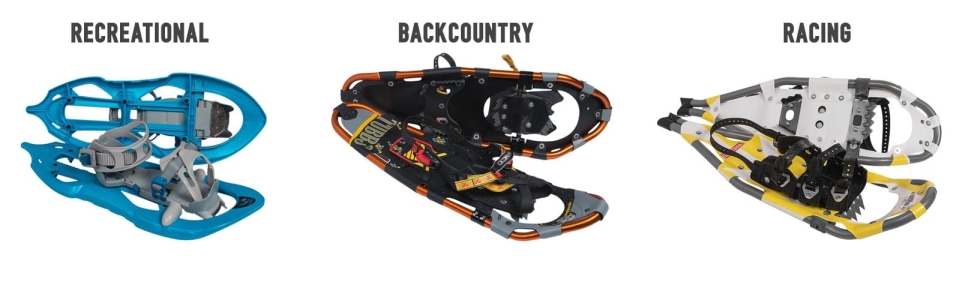
If you’re sure that you’re going to like this activity, it’s best to invest in a new pair of snowshoes of your own. There are several things that you need to consider before deciding which snowshoes to buy, aside from your budget, of course. The first and foremost is the type of snowshoes itself. There are three of them, and each is designed and built differently to match its purpose. Here are they:
- Recreational snowshoes: As you can tell from the name, this type of snowshoes is geared for a recreational outing down the groomed trails or some rolling hills. They’re lightly built, featuring considerably less traction device and smaller deck. The crampons are moderate and often made of lightweight aluminum instead of solid steel. They do provide you the grip you need to cover fair slopes, though you need to be careful as they can be easily bent. Expect to pay around $100-$150 for a pair of good recreational snowshoes.
- Backcountry snowshoes: These snowshoes are heavier compared to the recreational models; thanks to the more robust materials used to build them. They’re an overkill to use on flat terrain, and the extra weight can tire you out quickly. But, the added strength and durability are necessary to cover the more harsh environment off the beaten path. The traction system underneath the deck is more aggressive, showing larger teeth that can dig deep into the snow to secure your footing. The binding is bulkier and stiffer too. As for the price, good backcountry snowshoes like MSR Lightning Ascent are sold for nearly $300.
- Running snowshoes: Even lighter than recreational snowshoes are running snowshoes. Also known as racing snowshoes, this model is designed to provide maximum maneuverability, so that the user can run without exerting too much effort. The crampons are kept minimum, only enough to prevent you from slipping on the packed snow. The frames and the decking are much lighter too. Despite all of this, running snowshoes can be as expensive as the backcountry ones. Some snowshoe makers, like Dion, sell them for a more affordable price.
Choosing The Right Snowshoes
There are four factors that make the best snowshoes: traction, security, ease of use, and flotation. The first three of them have all things to do with the type of the snowshoes itself. What I’m saying is to get the right snowshoes for you, the first thing you need to do is figure out how and where you’re going to snowshoe. If you plan to go to the backcountry to see the untouched snow, then go with backcountry snowshoes. The traction provided by the moderate crampons of recreational snowshoes is unlikely enough to get you through the various slopes off-trail. Likewise, their binding might not be strong and secure enough to withstand the harsh condition in the backcountry.
As of flotation, you need to consider your weight load and also the terrain condition. In general, larger snowshoes provide better flotation, and you’ll need it if you’re a big guy hauling a big load on your back. Similarly, terrain with light fresh snow and deep powder demand for more flotation as opposed to one covered with packed snow. Many people prefer smaller snowshoes because they think they’ll be easier to move with, only to find out that their feet sink a lot into the snow because their snowshoes simply don’t offer enough surface to keep them afloat.
So how to get the right size? Most snowshoe makers disclose some information regarding the maximum weight their snowshoes can support. But, such is only accurate when the snow condition is ideal. So, again, you must also take into account the condition of the terrain you’re going to cover. If there are heaps of dry and loose snow, you should put on larger snowshoes than you normally would with the same weight load. We have made a separate post on how you can size your snowshoes properly. You can read it here.
Anyway, MSR gets around this problematic sizing issue by making its snowshoes compatible with an add-on flotation tails. You can buy the 22 or 26-inch model and walk on compact wet snow with ease. Once the snow gets powdery and loose, you can simply attach the add-on. The extra surface will help the snowshoes float better above the snow. The only catch is such add-on comes at an extra price.
Where to Snowshoe
The majority of people I know think that they have to visit their favorite ski resort to snowshoe. Well, it isn’t entirely wrong, but the fact of the matter is there are various other places where you can snowshoe just as fine. The easiest one to reach is probably a permit area–or also known as a Sno-Park–in your local neighborhood. The management commonly allows snowshoers to use their groomed trails.
If you’re looking to make your first step with snowshoes strapped beneath your boots, such a place offers many advantages. First, the terrain is likely flat and groomed, which can be a good training ground for you to get used to your snowshoes. It’s easy to cover but still fun enough to make it an enjoyable activity with friends and family. Additionally, it’s free too. All you need to pay is likely the parking fee. And since it’s situated within your town, you don’t need to drive too far from home.
Here are some alternatives if you can’t find any Sno-Park in your neighborhood:
- National forests and state parks
- Any trail you hike in other seasons
- Golf field (Make sure you confirm it first with the officials. Some gold centers do allow snowshoers.)
- Other established trails and controlled areas, which have been mapped.
Best Places to Snowshoe in North America
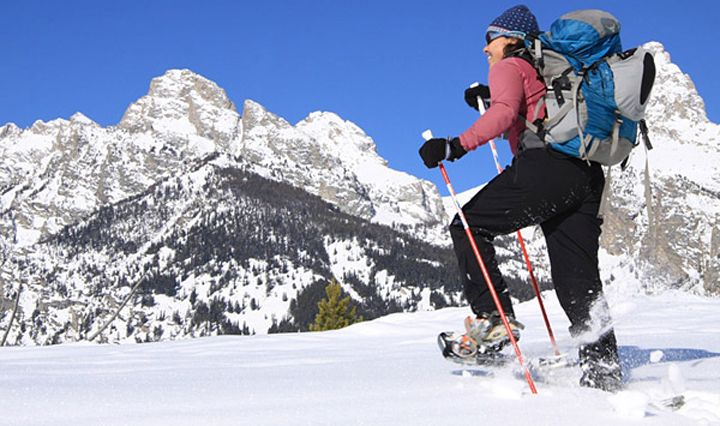
While you don’t have to go too far from your home to start snowshoeing, a ski resort does offer a few benefits for snowshoers. For instance, you can almost find a place that rents snowshoes to visitors. The options are obviously limited, and you may not find snowshoes that fit you perfectly, but it’s very cheap. The cost to rent a pair is usually a tenth–or less–of what you’re going to pay if you buy a new one. Also, since you’re going to snowshoe on the groomed system provided by the resort, you hardly need to break a trail.
Services like guided tours and moonlight treks are constantly offered too. You can snowshoe in a group–either with family and friends or complete strangers–which is really what makes this sport fun. I don’t know about you, but exploring a winter wonderland in a slow and steady pace while socializing with people who enjoy nature sounds like great fun to me. Anyhow, here are some best places in North America where you can find a resort to snowshoe:
- Seymour, British Columbia, Canada
- Sandia Crest, New Mexico
- McCoy Park, Beaver Creek, Colorado
- Stowe Mountain Resort, Vermont
- Camden Hills State Park, Camden, Maine
- Black Hills, South Dakota
- Jackson Hole Mountain Resort, Wyoming
- Porcupine Mountains Wilderness State Park, Michigan
- Northstar California Resort, USA
- Apostle Islands National Lakeshore, Bayfield, Wisconsin
For more about these places, you can read this article.
Snowshoeing Etiquette
When you’re out snowshoeing, you should understand that the trail doesn’t belong to you exclusively. You will be sharing it with skiers, snowboarders, and other snowshoers, and probably even some snowmobilers. Because of this, there are some guidelines that you need to follow so that everyone can enjoy their activity without being a nuisance to other people. Here are some of them:
- Most ski resorts provide separate trails for snowshoers. Knowing this, you should try not to walk on those used by cross-country skiers. The jagged crampons of your snowshoes can utterly ruin the groomed trail used by skiers.
- If your trail is overlapping the one used by skiers, always yield to them. Walk on the far left side of the trail.
- Step off the trail if you want to stop to catch your breath, grab a snack, or capture some photos. That way, the people behind you can go on without moving around you.
- As with hiking, always yield to uphill snowshoers. They have the right of way because their walk is more demanding than you. However, if they want to stop to take a quick break when you’re about to pass, don’t ask them to go on. In that case, you can just go ahead.
- Remember the “Leave No Trace” principle? Good. Please don’t leave anything in your track aside from the snowshoe prints, and don’t take anything other than pictures.
- Say hello to people you meet. This is not just you being polite and friendly. It’s actually important as by doing it, you’re telling those people your location. In an open nature where anything can go wrong, it always pays to let someone know where you are.
What to Wear
Snowshoeing may be easy, but it’s an intense sport and can be very demanding, especially if you rarely workout. Given that fact, it’s best not to wear as many layers as you would when you go skiing or snowboarding. While you may feel a little cold on the trailhead, your body temperature will increase as soon as you cover the first mile. At this moment, you’ll be glad that you’re not wearing that thick insulated jacket. In most cases, you can get away by having an enjoyable snowshoe outing with the following outfits:
- Base layer: This layer is supposed to keep you warm. Make sure you choose the most comfortable one.
- Long underwear top and bottoms
- Synthetic or wool socks. Bring 2-3 spares. You’ll never know when they’ll get wet because of the snow.
- Insulated layer: It’s the removable layer. You can take it on and off depending on how warm you are on the trail.
- On the top: fleece jacket or wool sweater
- On the bottom: fleece pants
- Outer layer: This is the layer that keeps you from getting wet. Put this on if it’s snowy or if you’re going to go through deep powder.
- Waterproof softshell jacket or insulated parka
- Waterproof softshell pants
- Accessories: They’re the little essentials that may seem unimportant, but you won’t be able to forgive yourself if you forget to bring them.
- Wool or fleece hat. Make sure you choose one that covers your ears too. Always bring spares.
- Waterproof gloves. When it’s colder than usual, wear mittens. Bring spares for this one too.
- Gaiters to keep snow away from your boots upper.
- Sunglasses, because the snow can be quite blinding if it’s sunny.
- Small day pack: This is used for other necessities which include the followings,
- Water. You’re going to need around 16 oz of it for every hour you spend on the trail.
- Snacks and lunches. Did you know that snowshoeing burns 420-1000 calories per hour? Yes, that’s a fact. So, bring some hearty meals with you!
- Sunscreen. So, you won’t get burned when it’s sunny.
- Binoculars or camera or your smartphone for sightseeing. Make sure you bring a protective case too (ziplock bag will do) to protect them from moisture.
- First-aid kit. For snowshoeing, the kit should include duck tapes (useful in case of sprained ankles and wrist), ziplock bags (to create ice packs using snow), emergency blankets, and other usual items.
- Safety gears. They include a headlamp or a flashlight, a map of the respective area, a compass, a whistle, and waterproof matches.
Avoid wearing cotton for your base layers. It may be more comfortable as it can absorb sweat more quickly than synthetic material. However, cotton also takes longer time to dry. That, combined with the chilly winter air, can make you feel all cold on the trail.
Boots for Snowshoeing
No footwear is specifically designed for snowshoeing, which means you can wear any boots you like. In fact, most of those who take part in snowshoe racing choose to go with a pair of plain tennis shoes because they’re lightweight and have flexible soles, leading to better maneuverability. Still, in most cases, you’ll likely have the best comfort with waterproof hiking boots.
Compared to winter/snow boots, hiking boots are much lighter, which is important. There’s no point in picking out light snowshoes if you put on heavy boots on top of them, isn’t it? Besides, despite the waterproofing, the upper of hiking boots are still breathable. Their soles are more flexible too, while still providing solid support for your feet. There’s a higher chance that snow will creep in through the upper though, so make sure you bring a pair of gaiters for extra protection against snow.
Now I’m not completely against beefy snow boots for snowshoeing. They can be a good alternative when the days are exceptionally cold. However, under normal condition, the internal insulated layer that comes with winter boots are just too much for this sport. As I have pointed out before, snowshoeing is a highly aerobic activity. Your feet hardly need any extra insulation other than the socks you’re wearing to stay warm. Besides, the soles of snow boots are too stiff for a long walk, and they’re heavy too. Here are some of the best boots for snowshoeing.
Are Poles Necessary?
Whether or not poles are necessary when you’re snowshoeing depends largely on you. If you usually hike with poles, you will likely need poles as well for snowshoeing. In general, however, snowshoeing is safe enough without poles. Unlike a ski, snowshoe offers better footing on the snowy ground. The deck is larger, and it has a set of crampons too to provide some traction when you’re on an ascent or descent, minimizing the risk of tumbling down.
Still, using poles when snowshoeing is not without any advantage. You can significantly improve your stability as you make each step on the trail. I know I’ve said that your snowshoes alone are enough to keep you sure-footed, even on uneven terrain. However, walking with snowshoes is not the same as without. Its large decking will force you to widen your gait to prevent overlapping. You’ll find that walking is quite awkward in this way, especially if you’ve never gone snowshoeing before. With poles, at least you have something to hold on to, allowing you to be more confident with each step you make.
Moreover, when you’re snowshoeing, especially with a loaded backpack, your knees and back are under bigger pressure. By holding on poles, you can distribute the pressure better throughout your body, leading to better comfort and minimizing the risk of injury. Last but not least, you can work your upper body out more with poles, which may be worth considering if you aim to get lean as well.
Now if you do decide to use poles, you must know that you hardly need to buy a new one. Simply check if your old hiking poles are compatible with powder baskets, the ones that keep your poles from sinking into loose dry snow as you drive them down. Such accessories can be held for less than $10, significantly less than buying a new pair of poles.
If you don’t have any poles for snowshoeing, it’s best to buy the ones with telescoping design, so you can adjust them quickly to match the sloping of the terrain. Also, choose the ones that sport a lever lock instead of a twist mechanism. It’s quicker and more secure. Carbon poles may be lighter, but they’re also prone to breakage. Instead, opt for those made of aluminum. Alternatively, you can also get the hybrid model, the one that features carbon upper and aluminum lower. It’s more expensive than full aluminum shafts, but it’s lighter and equally strong. Last but not least, make sure they come with interchangeable baskets, so you can use them in all four seasons.
Snowshoeing with Kids
Just because snowshoeing is a highly aerobic activity doesn’t mean you can’t tag your children along with you. Snowshoeing can be a fun and exciting activity for kids in winter. It’s a good exercise for them, and they’ll love you more for actually trying to be a part of their life. That alone is a good enough reward for parents, isn’t it? Anyway, here are some helpful tips for snowshoeing with kids.
- Practice snowshoeing at home. Although snowshoeing is easy, some practice prior to the real trekking won’t hurt. Teach your kids to take on and off their snowshoes by themselves. Practice walking forward and making a U–turn. Remember to always do the practice on grass.
- Bring some friends. The easiest way to get your child excited about his/her first snowshoeing trip is by bringing one or two friends. The only catch is that you will have to manage more young souls along the way, which may not be too easy.
- Bring enough food for the lunch break, extra snacks, and water too. This should be pretty obvious. Chewing on snacks can help keep your kids spirit up and give them the energy to keep walking. Avoid having hot cocoa because it may lead to a sugar rush. Instead, bring warm apple cider in an insulated thermos. Here are some terrific hiking snack ideas and winter specific snack ideas.
- Plan your route with your kids. You shouldn’t exclude your kids when planning the route. Ask your kids to help you, although, in the end, it’s you who’ll make the decision. Just show them the map. Teach them how to read it using a compass. They’ll feel more responsible for the trip.
- Essential accessories: This includes extra gloves, extra socks, and extra hats. Also bring sunscreen, hand sanitizer, and plastic whistle for your kids.
- Play some games. Playing games is another great way to keep your kids engaged and excited about the journey you’re making. The games don’t have to be complicated. A simple thing like, “Scavenger Hunt” which is making a list of whatever interesting things your kids find on the way should be fine enough. Here are some more simple trail games from outdoors.org.
For more info dealing with what needs to be prepared before you take your kids snowshoeing with you, read this post.
Snowshoeing Tips for Beginners
- Know when to go: The best time to snowshoe is following after a snow storm. The sun usually shines brightly after a storm, providing a nice warmth on the trail. Besides, the storm also brings enough snow for you to stride through. It may sound obvious, but let me just say this too: always check the weather forecast before you go.
- Be prepared: Despite being easy, snowshoeing is still a sport and an intense one at that. You don’t have to be very athletic to do it, but it helps much if you get yourself used to walking prior to your first snowshoe trek. Also, dress properly. The list of the snowshoeing outfit above should make you feel comfortable; you will neither get too hot or too cold.
- Stay away from cotton: As you sort out your outfit, keep in mind to exclude anything made of cotton. It absorbs sweat like a sponge, and it remains wet for a long time. Wet cotton exposed to the cool air of winter is a good recipe to get you cold. Instead of offering insulation against the chilly weather, you’ll be shivering uncomfortably under your jacket.
- Pick your trail: As long as there’s enough snow on the ground, you won’t run out of options of the trail. You can snowshoe as near as around your local neighborhood park and as far as at a ski resort that provides a dedicated snowshoe trail. Snowshoes.com houses a massive list of snowshoe trails, not only in North America but worldwide.
- Start easy: As you select a trail, make sure that its difficulty level matches your experience, skill, and strength. If you have just started out, it’s just silly to choose a trail with many steep slopes. Instead, pick a trail on flat terrain, preferably, the one with little traffic. Some permit areas are located on flat ground and mostly have the snow groomed.
- Don’t forget your camera: Regardless of which trail you select, you’ll certainly be snowshoeing through a breathtaking winter wonderland. It’ll be a shame to keep such beauty to yourself. So, grab your camera. Snap a few pictures every now and then, and share them along with your story with friends and relatives through Facebook and Instagram.
- Bring some company: Being a social sport, it’ll make your trek more fun and exciting if you bring a company or two. Besides, as safe as it is, anything can still happen on the trail. You want to make sure there’s someone next to you that can pull you out of harm’s way should something unexpected happen. If you can’t find anyone to go with you, try to check out local Meetup.com groups. There should be plenty of new people sharing the same passion as you. More importantly, be sure you let someone know where you’re going and when you’ll be back. That way, they’ll know if you’ve run into trouble and where to start looking.
- Stay hydrated and nourished: Stock a few water bottles and hearty snacks into your backpack. Cold and dry air makes people dehydrated faster than hot air. Also, since snowshoeing burns a lot of calories, you will want to have a snack that can quickly replenish your energy. Here are some examples: apples, trail mix, almond butter, or try Clif Shot Bloks or GU chomps for an extra boost.
- Watch out for frostbite: This one is common on people who are out on cold snowy days for long. It can happen quickly, without you even realizing it. Fingers, toes, and face are usually the victim of this condition. You can prevent it by dressing up properly and never stopping for too long, especially if it’s windy. If it’s already happened–some patches of your skin turn pale, white, then waxy–find a way to warm the affected parts gently. Do not rub them as it will only worsen the damage.
- Have fun: There’s always that doubt and fear when you’re about to try a new sport, but remember this. Anyone who can walk CAN also snowshoe. It’s the friendliest of all winter sports. So, just take your first step; break your own trail, and have a good time doing it. By snowshoeing, you don’t only try to stay active and healthy in winter but also refresh your mind by seeing the beauty of nature in winter.